

Table of Contents
- What Makes the Tacoma a Capable Overlanding Platform
- Overland Recovery Gear Essentials for the Tacoma
- Best Suspension Upgrades for Tacoma Overlanding
- Tacoma Bed Rack Systems and Rooftop Tents
- Truck Bed Storage and Gear Organization
- Tires and Off-Road Lighting for Tacoma Overlanding
- Power, Communication, and Navigation Systems
- Budget vs. Premium Build Tiers and Fuel Economy Impact
- Frequently Asked Questions
Last Updated: September 21, 2026
What Makes the Tacoma a Capable Overlanding Platform
The Toyota Tacoma has earned its reputation as one of the most trusted platforms for vehicle-based travel. Its body-on-frame construction, available four-wheel drive, and deep aftermarket support make it a natural starting point for an expedition vehicle. At Lee Mods, we've watched countless Tacoma owners move from daily driving to serious off-grid adventures: the truck handles it, but the right gear makes it comfortable.
Overland Recovery Gear Essentials for the Tacoma
Recovery gear is the one category you should never skip. A Tacoma stuck in mud or sand without proper tools turns a fun trip into a multi-hour ordeal.
Traction Boards and Snatch Straps
Traction boards are rigid, stackable panels that give your tires grip when you're bogged down. They work in sand, snow, and mud, and are safer than a tow strap alone.
- Traction boards: best for sand, snow, and loose gravel
- Snatch straps: best for mud and deep ruts where a gentle pull works
- Always carry gloves and a dampener to reduce injury risk if a strap fails
Winches and Air Compressors
A winch gives you self-recovery capability when nothing else works. Look for one rated at roughly 1.5 times your Tacoma's gross vehicle weight, mounted on a bumper designed for that load.
Best Suspension Upgrades for Tacoma Overlanding
The stock Tacoma suspension works fine for daily driving. Load it with a rooftop tent, fridge, and weeks of gear, and it sags fast. That's where suspension upgrades earn their keep.
Lift Kits and Payload Capacity
A suspension lift raises ride height to clear larger tires and improve approach angles. Typical overlanding lifts range from 2 to 3 inches, enough for most trails without wrecking on-road manners.
- Spacer lifts: cheap, keep stock ride, but don't add load capacity
- Coilover and leaf spring upgrades: support weight and improve damping
- Payload capacity is the number that matters most when you're loaded for a trip
Tacoma Bed Rack Systems and Rooftop Tents
Bed racks and rooftop tents turn a pickup into a mobile base camp. They're the backbone of most Tacoma overlanding builds.
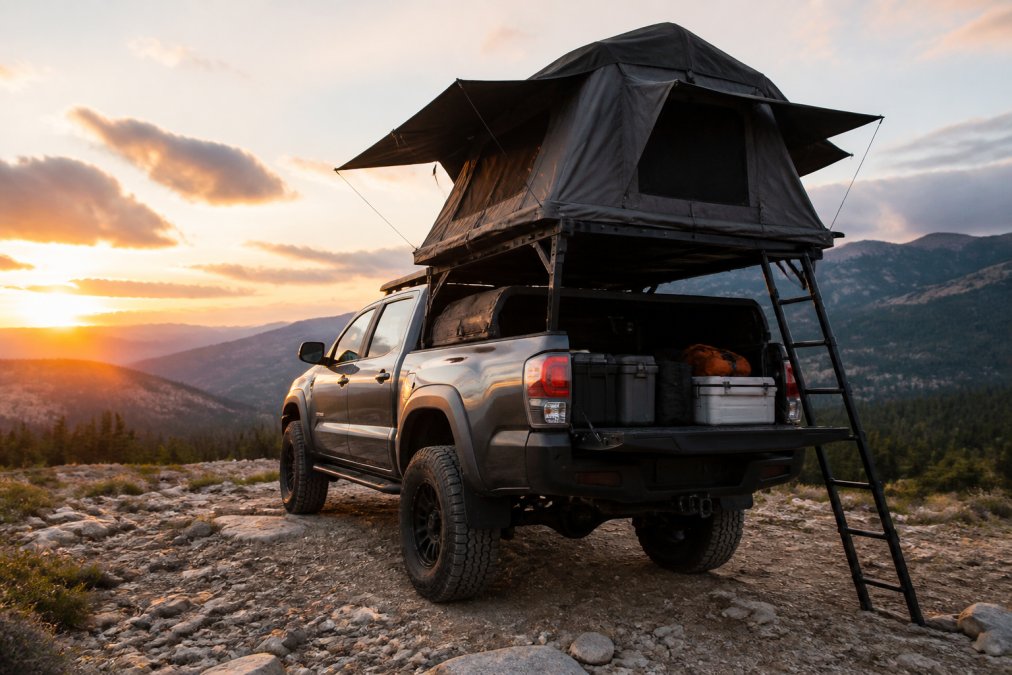
Bed Rack and Tent Systems
A bed rack mounts over the truck bed and gives you a platform for a rooftop tent, awning, or gear boxes. It keeps weight low and centered, which helps handling on winding trails.
Rooftop tents come in two main styles:
- Soft-shell tents: lighter and cheaper, but slower to set up
- Hard-shell tents: heavier and pricier, but set up in under a minute
Truck Bed Storage and Gear Organization
Gear organization separates a comfortable trip from a chaotic one. Loose items become projectiles on rough terrain, and digging for a wrench in the dark gets old fast.
A few storage principles that work for most builds:
- Use drawer systems to keep tools and recovery gear accessible
- Store heavy items low and forward over the rear axle
- Keep a first-aid kit and fire extinguisher within arm's reach
- Label bins so you're not guessing at camp
Tires and Off-Road Lighting for Tacoma Overlanding
Tires and lighting are where your build meets the trail, and they are two of the heaviest, most consequential purchases you will make. Get the load range wrong and you will either ride on a stiff sidewall or exceed what the tire can safely carry loaded. Get the lighting wrong and you will either blind oncoming drivers or run out of usable light when you need it.
All-Terrain and Mud-Terrain Tires
All-terrain tires balance on-road comfort with off-road grip and are the default for most overlanders. Mud-terrain tires dig through deep mud and loose rock but run louder, wear faster on pavement, and cost more per mile of tread life.
- Match the tire's load index to your loaded axle weight, not your curb weight. Weigh the truck at a scale with gear and passengers aboard.
- Going up one or two sizes (for example, from a 265/70R16 to a 285/70R17) changes your effective gearing and speedometer reading, and it adds rotating mass that costs both acceleration and fuel economy.
- All-terrain: best for mixed highway and trail use, quieter, longer tread life
- Mud-terrain: best for wet, muddy, or rocky terrain, but louder and faster-wearing
- Always confirm the spare matches the diameter of the four road tires, or a flat turns into a drivetrain problem on a four-wheel-drive truck
Off-Road Lighting Solutions
Lighting extends your driving window and improves safety on dark trails, but the goal is usable light, not maximum lumen count. A well-balanced setup includes:
- LED light bars for wide forward coverage on open trail
- Pod lights aimed outward for side and ditch lighting, which is what actually helps you see a trail edge or an obstacle beside the truck
- Rear-facing lights for camp setup and reversing in the dark
Two things to plan before you buy:
- Electrical load. A large light bar can draw 20 amps or more. That draw has to come from somewhere, which is why lighting decisions belong in the same conversation as your battery and charging plan.
- Legal use. High-output auxiliary lights are generally restricted for on-road use and must be wired to a separate switch so they cannot be left on with your headlights. Check your state and local rules before you mount anything above the hood line.
The Weight and Fuel Penalty Nobody Mentions
This is the part most gear lists skip. Five Load Range E mud-terrains can add well over 100 pounds of unsprung weight versus stock tires, and a full lighting setup adds another 20-40 pounds up high. That weight eats into your payload budget, raises your center of gravity, and costs fuel economy every mile.
Power, Communication, and Navigation Systems
Remote travel demands reliable power and a way to call for help. A dual battery system or portable power station keeps your fridge, lights, and devices running without draining your starter battery.
- Dual battery systems: run accessories without risking a dead start
- Portable power stations: flexible, removable, and easy to recharge
- Satellite messengers: emergency SOS and basic messaging off-grid
Budget vs. Premium Build Tiers and Fuel Economy Impact
Every build balances cost against capability, and weight is the hidden variable that ties the two together. It also determines whether your Tacoma still drives well after the build is done.
Start With Your Payload Budget, Not Your Wish List
Your Tacoma has a Gross Vehicle Weight Rating (GVWR) on the driver's door jamb sticker, along with a separate payload figure. Payload is everything you add on top of curb weight: passengers, fuel, gear, rack, tent, bumpers, winch, and the modifications themselves. A typical mid-size truck payload rating lands in the 1,000-1,400 pound range depending on cab, bed length, and drivetrain, and it is easy to blow through without realizing it.
- Two adults: roughly 350 pounds
- Rooftop tent and bed rack: 150-250 pounds
- Recovery gear, tools, and spares: 100-150 pounds
- Fridge, kitchen, and water: 100-200 pounds
- Armor, sliders, and skid plates: 150-300 pounds
- Winch and bumper: 100-150 pounds
Three Build Tiers, With Real Trade-offs
| Tier | Typical Focus | Weight Added | Trade-off |
|---|---|---|---|
| Budget | Recovery gear, tires, basic storage | 100-200 lb | Limited load support, fewer comforts, stock suspension sags under load |
| Mid-range | Suspension, bed rack, lighting | 300-500 lb | Better capability and comfort, noticeable fuel and braking penalty |
| Premium | Full suspension, power systems, hard-shell tent, armor | 600-900+ lb | Maximum comfort and capability, highest fuel use, cost, and wear on components |
The point is not the exact numbers, which vary by truck and gear, but the pattern: each tier roughly doubles the weight the truck carries and demands more from your suspension, brakes, and drivetrain.
How Weight Actually Hurts Fuel Economy
Fuel economy loss from a build is not linear and not just about total pounds. Three mechanisms do most of the damage:
- Rolling resistance. Heavier, more aggressive tires take more energy to turn. This is usually the single biggest hit.
- Aerodynamic drag. A rooftop tent, light bar, and rack sit in the airflow and create drag that grows with speed. Drag is the reason a build that costs 1 MPG around town can cost 3 MPG at highway speed.
- Acceleration and braking. Every extra pound has to be sped up and slowed down, which shows up as worse throttle response and longer stopping distances, especially on a truck already near its payload limit.
A Build Path That Respects the Budget
Rather than buying everything at once, most successful builds follow a phased approach:
- Phase 1, Essentials. Recovery gear, a matched set of all-terrain tires, and basic bed storage. This gets you off pavement safely without touching suspension.
- Phase 2, Comfort. Suspension rated for your intended load, a bed rack, and lighting. Do the suspension before the tent, not after, so the springs match the weight.
- Phase 3, Expedition. Dual battery or portable power, a hard-shell tent, and armor. This is where weight climbs fastest, so recheck your payload and fuel budget before committing.
Build in phases, weigh the truck at each step, and treat payload and fuel economy as fixed budgets rather than afterthoughts. The best overlanding gear for a Tacoma is the gear that still lets the truck drive well when it is fully loaded.
Frequently Asked Questions
What are the best overland setups for a Toyota Tacoma?
A capable Tacoma overlanding build starts with recovery gear like traction boards and a winch, then adds a suspension lift to handle extra weight. Tacoma bed rack systems support a rooftop tent and gear organization. Finish with all-terrain tires, off-road lighting, and a dual battery system for off-grid power. Match every addition to your truck's payload capacity to keep handling predictable.
Are Toyota Tacomas good for offroading?
Yes. The Tacoma's body-on-frame construction, available four-wheel drive, and strong aftermarket support make it a popular choice for off-road and overlanding use. Skid plates and rock sliders protect the underside on rough trails, and the bed offers flexible space for truck bed storage and camping setups. Regular maintenance and appropriate tires keep it trail-ready for years.
What is the best gear to have for overlanding?
Prioritize safety and self-reliance: a first-aid kit, recovery gear such as a snatch strap and traction boards, an air compressor, and a satellite messenger for remote areas. For comfort, add a portable power station, water filtration, and a camping kitchen. Storage and organization keep weight low and accessible. Build in stages so you understand how each addition affects fuel economy and payload.
How do I prepare my Toyota Tacoma for long-distance overlanding?
Start with a weight audit: know your payload capacity and subtract passengers, fuel, and gear. Upgrade suspension to handle the load, add skid plates and rock sliders for protection, and install a dual battery system for off-grid power. Carry recovery gear, navigation software, and a tire pressure monitoring system. Test your setup on shorter trips before a long expedition.
Building a Tacoma for overlanding is a process, not a single purchase. The challenge is choosing gear that fits your truck, your payload limits, and the terrain you actually drive. Lee Mods curates vehicle-focused accessories built for reliable fitment, so you spend less time guessing and more time on the trail. Shop by vehicle to find parts designed for your Tacoma, backed by straightforward support and information you can trust.