

Table of Contents
- Understanding Your Vehicle's Electrical System
- Battery Terminal Maintenance and Cleaning
- Best Practices for Installing Aftermarket Electronics
- Proper Wire Routing, Protection, and Grounding Techniques
- Regular Inspection of Wiring, Connectors, and Fuses
- Vehicle Electrical System Warranty Implications
- Automotive Electrical Troubleshooting Guide
- Preventing Common Electrical Failures and Short Circuits
- Frequently Asked Questions
Last Updated: September 23, 2026
Understanding Your Vehicle's Electrical System
Your vehicle's electrical system is a complex network of components, battery, alternator, voltage regulator, sensors, control modules, and wiring harnesses, that communicate through the engine control unit (ECU) to power everything from the engine to infotainment displays.
Understanding how these parts interact is the first step toward preventing vehicle electrical system damage. A corroded battery terminal can cause voltage drops that trigger sensor failures throughout the system. An improperly routed aftermarket wire can chafe against metal and create short circuits that damage expensive electronics.
Most electrical failures are preventable with straightforward maintenance and smart installation practices.
Battery Terminal Maintenance and Cleaning
Battery terminals are the first point of contact in your electrical system and most vulnerable to corrosion. Oxidation creates a barrier that increases resistance and reduces voltage delivery, where most electrical problems start.
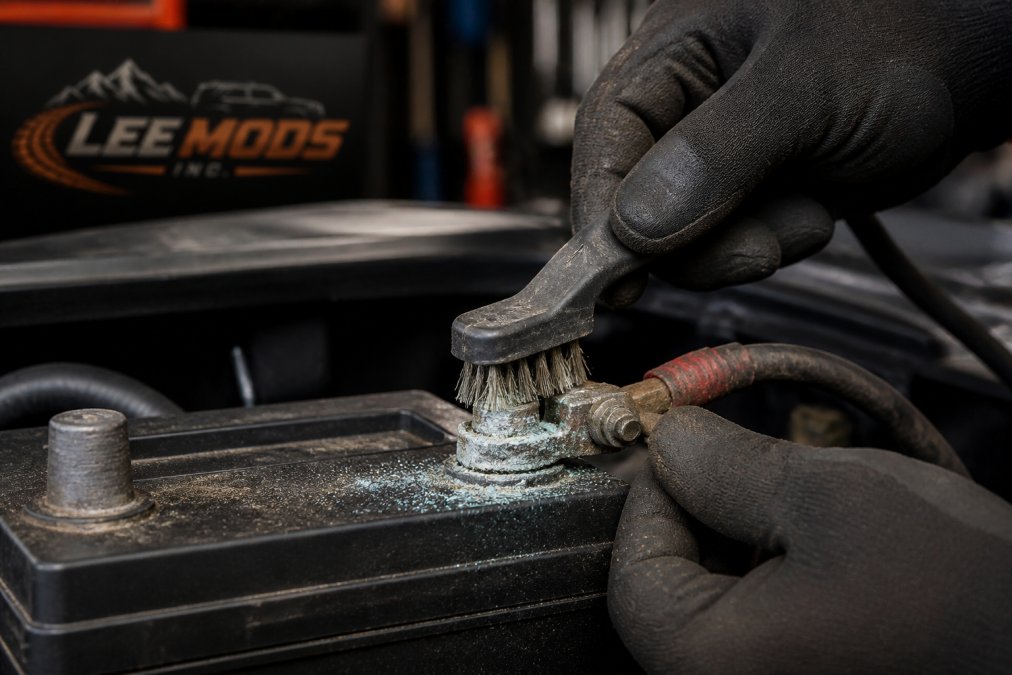
Cleaning corroded terminals is straightforward and requires minimal tools:
- Disconnect the negative terminal first (black cable)
- Disconnect the positive terminal (red cable)
- Mix baking soda with water to create a paste
- Apply the paste to corroded areas and scrub with a wire brush
- Rinse thoroughly with clean water
- Dry completely with a clean cloth
- Reconnect the positive terminal first, then the negative
After cleaning, apply dielectric grease to prevent future oxidation. Check terminals every six months in humid climates or after winter driving.
Best Practices for Installing Aftermarket Electronics
Improper installation of aftermarket accessories, dashcams, stereos, auxiliary lighting, can introduce short circuits, voltage spikes, or parasitic drain that damages expensive modules.
Aftermarket wiring must integrate cleanly with your vehicle's existing electrical architecture without overloading circuits. Every component draws amperage; add too many without proper circuit protection and you exceed factory wiring capacity.
Follow these installation rules:
- Use a fused power distribution block rated for your total accessory amperage
- Run power directly from the battery through an inline fuse holder within 18 inches of the battery
- Never tap into factory wiring harnesses for power (this overloads factory circuits)
- Use relays for any accessory drawing more than 10 amps
- Ground all accessories to a clean, bare metal point on the vehicle frame
- Never ground to plastic trim, painted surfaces, or the body shell
The fuse rating should match the wire gauge and accessory amperage. A 20-amp fuse protecting a 10-gauge wire will fail before the wire melts, leaving your accessory unprotected.
Proper Wire Routing, Protection, and Grounding Techniques
Wire routing determines longevity. Wires exposed to engine heat, pinch points, or abrasion degrade quickly, leading to short circuits and potential fires.
Route aftermarket wiring through existing grommets (rubber-lined openings that protect wires from sharp edges). If no grommet exists, drill a hole and install a new one.
Use conduit or split loom tubing to bundle and protect wires in high-risk areas:
- Engine bay (heat and moving components)
- Wheel wells (road debris and moisture)
- Door jambs (flexing and pinch points)
- Under the vehicle (rocks and branches)
Secure conduit with cable ties every 12 inches. Keep wires at least 6 inches away from moving engine components like belts and pulleys. Never route wires across sharp edges or allow them to rest directly on metal surfaces.
Grounding is equally critical. Poor ground connections create voltage instability that damages sensors and modules. Every aftermarket component needs a dedicated ground wire to a clean, bare metal point on the frame or engine block.
Regular Inspection of Wiring, Connectors, and Fuses
Preventing vehicle electrical system damage requires routine inspection with actual measurements, not just visual checks. Monthly visual checks combined with multimeter testing catch issues before they cascade.
Visual inspection: Inspect battery terminals for corrosion or white/blue/green buildup. Check the fuse box for blown fuses or loose connections. Look for visible damage to wiring insulation in high-heat areas (engine bay, wheel wells, door jambs), cracks, melting, or discoloration indicate damage.
Multimeter testing for voltage drops: A multimeter reveals hidden problems in connectors and wiring that look fine but have high resistance.
-
Battery voltage test: Set your multimeter to DC voltage. Engine off: 12.4-12.6V (below 12.4V indicates weak battery). Engine running: 13.5-14.5V (below 13.5V suggests alternator failure).
-
Voltage drop across battery terminals: Engine running with headlights on, test positive terminal to positive cable connector. Reading should be less than 0.1V; above 0.2V indicates corrosion, loose terminal, or damaged cable. Repeat on negative side.
-
Voltage drop across fuses: Engine running with circuit active, test both sides of the fuse. Reading should be zero; any reading above 0.1V indicates fuse failure.
-
Ground continuity test: Set multimeter to resistance mode. Disconnect the component. Test ground wire to bare metal on engine block or frame. Reading should be less than 1 ohm; higher readings indicate poor ground connection, a common cause of sensor errors.
Parasitic drain testing: If your battery dies after a week unused, you have parasitic drain. Disconnect the negative terminal. Set multimeter to DC amps. Reading should be less than 50mA when doors closed and vehicle in sleep mode. Above 100mA indicates a powered component. Pull fuses one at a time to isolate the problem.
Inspection checklist:
- Battery terminal corrosion or loose connections
- Cracked or damaged wire insulation
- Loose connectors or corroded pins
- Blown fuses or tripped breakers
- Battery voltage outside 12.4-12.6V (off) or 13.5-14.5V (running)
- Parasitic drain when vehicle is off
- Flickering lights or dim headlights
- Ground continuity at all aftermarket components
Perform this inspection every three months or before long trips. Catching issues early prevents breakdowns and protects expensive electronics.
Vehicle Electrical System Warranty Implications
Most manufacturers cover electrical components under powertrain warranty for 5 years or 60,000 miles, but aftermarket modifications can void coverage. Keep detailed records of installations. Use OEM-equivalent components where possible. Before installing significant aftermarket electronics, contact your manufacturer's warranty department to confirm coverage.
Automotive Electrical Troubleshooting Guide
Troubleshooting modern vehicles requires understanding how contemporary electrical architecture differs from older vehicles. Modern cars use a CAN bus (Controller Area Network) where multiple control modules communicate through a shared data line.
Why modern vehicles are different: Older vehicles had independent circuits; modern vehicles integrate everything through the ECU and control modules. A single corroded battery terminal can trigger cascading failures, check engine lights, transmission problems, stability control warnings, fuel pump failures, because modules constantly communicate and cross-check data.
Safe troubleshooting sequence:
Step 1: Battery and charging system (always start here)
Check voltage at battery terminals. Below 12.4V indicates dead battery. If normal, check alternator at 2,000 RPM, should read 13.5-14.5V. For low battery voltage, use a smart charger or voltage-regulated jump-starter rather than jumper cables, which can damage sensitive electronics.
Step 2: Ground integrity (the most overlooked cause of modern electrical failures)
Before disconnecting the battery or making any electrical changes, test ground continuity.
Step 3: Avoid disconnecting the battery in modern vehicles
Step 4: Check for continuity in the affected circuit
Step 5: Test voltage at the component itself
Step 6: Identify short circuits
When to stop and call a professional:
Basic troubleshooting checklist:
- Check battery voltage (12.4-12.6V off, 13.5-14.5V running)
- Test ground continuity (less than 1 ohm)
- Test continuity in affected circuit
- Inspect for damaged insulation or corroded connectors
- Verify proper grounding at all points
- Check fuse ratings and replace blown fuses
- Test voltage at the component itself
- Consult your vehicle's service manual
Preventing Common Electrical Failures and Short Circuits
Inspect wiring regularly for heat damage: melted insulation, discolored jackets, or burnt-smelling areas. Address immediately to prevent short circuits or fires.
Frequently Asked Questions
What are the early warning signs of vehicle electrical system failure?
Watch for dimming headlights, slow engine cranking, flickering dashboard lights, or a burning smell near the engine bay. Battery terminals showing white or blue-green corrosion indicate oxidation that disrupts electrical flow. Intermittent sensor failures or check engine codes can signal voltage stability issues. These symptoms often precede complete system failure, so address them promptly to prevent cascading damage to the alternator, ECU, and other components.
How do aftermarket accessories impact vehicle electrical warranties?
Improper installation of aftermarket electronics can void your manufacturer's warranty if the modification causes damage to covered components. Manufacturers may deny warranty claims for electrical failures they trace back to aftermarket wiring, fuses, or circuit overload from added accessories. To protect your warranty, use OEM-spec components where possible, follow factory wiring diagrams, and ensure proper grounding and circuit protection. Document your installation with photos and keep receipts. When in doubt, consult your vehicle's warranty documentation or contact the manufacturer before installation.
What tools do I need to safely diagnose and prevent electrical damage?
A multimeter is essential for testing continuity, voltage, and amperage across circuits. Use it to check for parasitic drain on your battery and verify proper voltage output from the alternator. A test light helps identify live circuits without damaging sensitive electronics. Wire strippers, crimpers, and heat shrink tubing ensure proper connections that resist corrosion. For modern vehicles with complex ECU systems, a basic OBD2 scanner reads diagnostic codes. Grommets and conduit protect wire harnesses from pinch points and abrasion. These tools cost under $50 combined and prevent expensive sensor failures and electrical fires.
Can improper wiring void my vehicle's factory warranty?
Yes. If the manufacturer determines that improper wiring or an aftermarket modification caused an electrical failure, they can deny warranty coverage for that component and potentially related systems. This is especially true if the wiring created a short circuit, voltage surge, or circuit overload that damaged the ECU, infotainment system, or sensors. To stay within warranty, use proper gauge wire for your amperage needs, install fuses rated for the circuit, ground all components to the chassis, and route wires away from heat sources and moving parts. Keep installation documentation and use OEM connectors when possible.